
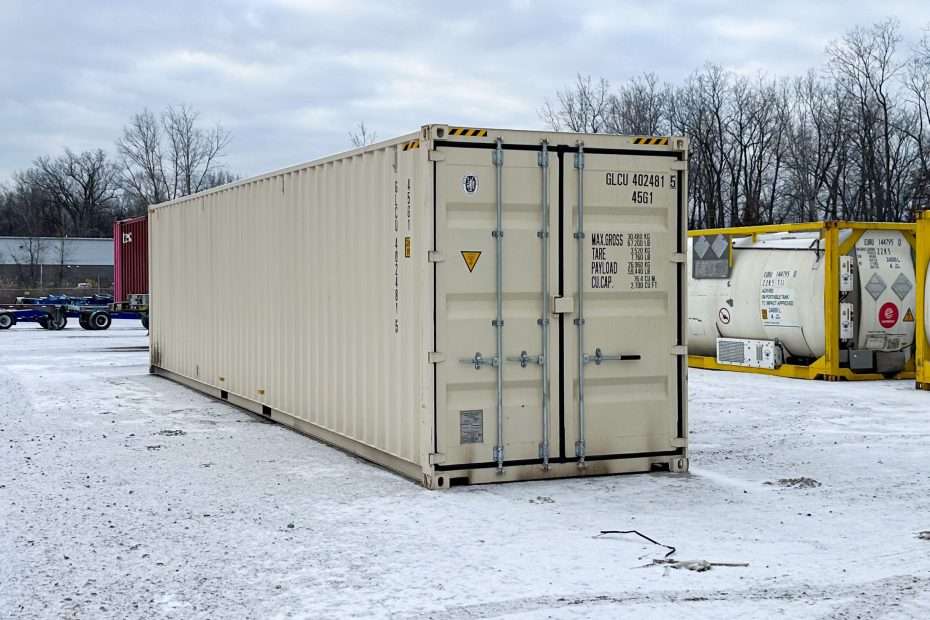
Michigan winter creates three job-site problems: moisture, security, and access. Tools rust. Materials become damaged. Snow and ice make daily retrieval difficult. Unattended sites become vulnerable during slower months.
A shipping container provides a secure, weather-resistant storage point for tools, equipment, materials, and seasonal supplies. With the right setup, a container for construction site storage can help contractors close out the season efficiently and restart in spring without replacing missing or damaged inventory.
Constable Containers supplies USED, wind-and-watertight containers throughout Michigan for sale or lease. Choose a 20ft, 40ft standard, or 40ft High-Cube unit based on site requirements.
Step 1: Select The Right Container Size
20ft Container : Tools And Compact Inventory
Best for:
- Hand tools and power tools
- Fasteners and job-site supplies
- Safety equipment
- Small generators
- Ladders and compact equipment
- Materials for one active phase of construction
A 20ft container fits most residential and smaller commercial sites. It requires less placement space and may be easier to position around existing structures, driveways, and access lanes.
View the 20ft Used Wind and Watertight Container.
40ft Standard Container : Larger Sites And Materials
Best for:
- Multiple crews
- Lumber and building materials
- Scaffolding components
- Landscaping equipment
- Larger tools and machines
- Long-term commercial projects
A 40ft container provides significantly more floor space for contractors storing materials over an extended winter shutdown. Use shelving, pallets, and designated walkways to maintain access.
View the 40ft Standard Used Wind and Watertight Container.
40ft High-Cube Container : Added Vertical Clearance
A 40ft HC container adds approximately one foot of interior height compared with a standard 40ft unit. The additional clearance helps with:
- Tall shelving
- Stacked materials
- Insulated storage areas
- Bulky equipment
- Higher-volume inventory
View the 40ft HC Used Wind and Watertight Container.

Step 2: Choose A Winter-Ready Placement Area
Container placement affects snow removal, drainage, security, and spring access. Complete this review before delivery.
Use Firm, Elevated Ground
Place the container on:
- Compacted gravel
- Concrete
- Asphalt
- Railroad ties
- Concrete blocks
- Properly rated timbers
Avoid low areas where rainwater, melting snow, or ice collects. Elevating the container slightly improves drainage and airflow beneath the floor. It also reduces the risk of meltwater reaching stored materials.
Do not rely on soft, muddy ground. Freeze-thaw cycles can shift the container and create difficult door alignment.
Plan For Snow Clearing
Leave sufficient room around the doors for:
- Snowplow access
- Shoveling
- Snowblower operation
- Worker movement
- Door swing clearance
- Material loading
Keep the front of the container clear of parked vehicles, snow piles, temporary fencing, and stored materials. A blocked door creates an access problem when winter conditions are already slowing the site.
Orient Doors Away From Prevailing Winds
Position the doors away from the direction of prevailing winter winds where the site allows. This can reduce snow drifting directly against the doors and help limit wind-driven precipitation.
Also inspect the area for:
- Overhanging branches
- Unstable temporary structures
- Drainage flowing toward the container
- Nearby snow-storage zones
- Flooding or runoff paths
Step 3: Inspect The Container Before Loading
A USED container should be checked before it becomes the site’s primary storage point.
Inspect:
- Roof seams
- Side panels
- Corner posts
- Door gaskets
- Locking bars
- Hinges
- Floor condition
- Interior walls
- Roof areas where water may pool
A wind-and-watertight, or WWT, container should protect contents from normal rain and snow exposure. However, inspect the unit after delivery and report any concern before loading valuable equipment.
Open both doors on a dry day. Check for light entering through damaged areas. Remove dirt, leaves, standing water, snow, and debris. Lubricate locking bars and hinges with a product rated for outdoor use. Replace damaged weather seals when necessary.
Step 4: Prevent Condensation Damage
A steel container can be weather-resistant and still develop interior condensation. Michigan’s freeze-thaw cycles create temperature changes between the exterior steel and the air inside the container.
Use this moisture-control checklist:
-
Load Dry Contents
Do not store wet tools, snow-covered equipment, damp lumber, or recently washed machinery. -
Elevate Inventory Off The Floor
Use pallets, shelving, racks, or treated blocking. Keep boxes and tool cases above the steel floor in case of minor water intrusion or melting snow. -
Leave Air Gaps
Keep stored items away from the walls and ceiling. Leave space between stacks so air can circulate around tools and materials. -
Use Silica Gel Or Desiccants
Place silica gel, DampRid, or other commercial desiccants throughout the container. Replace or recharge them according to manufacturer instructions. -
Cover Metal Tools
Use breathable covers where possible. Avoid tightly sealing damp tools inside plastic, which can trap moisture against metal surfaces. -
Use Plastic Bins Instead Of Cardboard
Plastic totes provide better protection against humidity, minor leaks, and condensation than standard cardboard boxes. -
Install Ventilation When Needed
Passive vents can help reduce trapped humidity. A qualified contractor should determine the proper vent type and placement, particularly if the container will be modified.
Do not heat an uninsulated container intermittently without a plan. Warm, humid air contacting cold steel can increase condensation. If the container will be used as an office or heated workspace, plan for insulation, controlled ventilation, and appropriate electrical work.
Step 5: Protect Tools, Equipment, And Materials
Organize the container before the final shutdown. Do not treat it as an open storage bin.
Tool Storage
- Clean dirt and salt from power tools
- Drain fuel-powered equipment according to manufacturer guidance
- Remove batteries from tools where appropriate
- Store batteries in temperature-controlled conditions when required
- Apply rust protection to exposed metal
- Label cases and shelves by crew or trade
- Keep high-value tools away from the doors
Building Materials
- Store lumber on level supports
- Keep drywall, insulation, and paper products elevated
- Protect cement, adhesives, and other temperature-sensitive products
- Check manufacturer storage requirements for paints, chemicals, and sealants
- Do not store liquids that can freeze unless the container has suitable climate control
A shipping container is not automatically climate-controlled. Materials with temperature restrictions may require a heated, insulated, or separate indoor storage area.

Step 6: Secure The Container And The Job Site
Winter shutdowns often mean fewer workers and less daily activity. Strengthen the container’s security before the final crew leaves.
Recommended security measures:
- Install a heavy-duty puck lock
- Use a welded or bolted lock box to shield the lock
- Inspect door locking bars for damage
- Keep the container away from easy public-road access where practical
- Add motion-activated lighting
- Use cameras or remote monitoring when available
- Record an inventory of stored tools and equipment
- Photograph valuable contents for insurance documentation
- Secure loose materials elsewhere on the site
Anchor the container or consult a qualified professional when the site is exposed to high winds, open fields, or severe weather. Do not improvise anchors that could damage the container or create a worker hazard.
Lighting should illuminate the doors, surrounding ground, and access path. Position fixtures to reduce shadows without creating glare for workers or nearby traffic.
Step 7: Create A Snow And Inspection Schedule
Assign responsibility for winter checks. A container left unattended for several months should still be inspected after major weather events.
Check after:
- Heavy snowfall
- Ice storms
- High winds
- Rapid thaws
- Flooding or significant rain
- Unauthorized site access
Inspection priorities:
- Clear snow from the door area
- Check for ice around the locking bars
- Inspect the roof for excessive snow accumulation
- Look for new leaks or damaged seals
- Confirm the container remains level
- Verify lighting and camera operation
- Check that stored materials remain elevated and dry
Avoid climbing on the container roof unless proper fall protection and safe access are provided.
Step 8: Plan The Spring Restart
Winterization should make spring mobilization faster.
Before shutdown, create a basic container map showing:
- Tool locations
- Material categories
- Crew assignments
- High-value inventory
- Items requiring inspection
- Items scheduled for the first spring phase
Label each shelf, pallet, and equipment group. Keep the spring-start checklist in a weather-resistant sleeve near the door, and maintain a digital copy for the project manager.
When the site reopens:
- Inspect the exterior and roof.
- Clear snow, ice, and debris.
- Open the container and ventilate it on a dry day.
- Check for condensation, rust, leaks, or pests.
- Test power tools and equipment before deployment.
- Recount high-value inventory.
- Remove unused desiccants and replace them as needed.
- Reorganize materials for the next construction phase.
Get A Container For Your Michigan Construction Site
Constable Containers is a local, family-owned Michigan business serving contractors, businesses, and property owners with practical storage solutions. Our containers use weather-resistant Corten steel construction and are available in 20ft, 40ft standard, and 40ft HC sizes.
Choose SALE or LEASE based on the length of your project. Delivery is available with a straightforward FLAT $500 DELIVERY RATE UP TO 90 MILES, subject to site and delivery verification.
Request Pricing In 3 Steps
- Select Rent A Container or Buy A Container.
- Enter your ZIP code, delivery date, contact information, and container requirements.
- Receive an instant, no-obligation quote. Our team will verify details and freight requirements.
$100 OFF ON ALL CONTAINER PURCHASES : LIMITED TIME ONLY
Contact Constable Containers for a 20ft tool-storage unit, a 40ft material-storage unit, or a 40ft HC container for larger winter inventory. Local service, transparent pricing, and dependable Michigan delivery.